 This post was last updated 5 years 8 months 19 days ago, some of the information contained here may no longer be actual and any referenced software versions may have been updated!
Twitch is a live streaming platform which started life in 2011 as justin.tv and is now owned by Twitch Interactive, a subsidiary of Amazon. The site primarily focuses on video game live streaming but can be used to stream just about anything (within the Twitch terms and conditions) including creative content, “in real life” streams, and more recently music broadcasts. Twitch offers successful streamers the means to monetize their streams via two levels of partnership as well as adverts and donations. There are many full time professional game streamers earning a substantial income from Twitch live streaming.
About a Stream
Alas – I am not really a gamer, I played Doom in the 90’s and that’s about it. As a hobby music producer and wannabe superstar DJ the live music broadcasts on Twitch were of much more interest to me, and as a web developer, programmer, the technology behind the live streams also interested me.
Most game streamers on Twitch require at least two fairly high powered Windows PC’s to stream their content live to Twitch, one PC for game play and one PC to capture the game play video content and encode it into a format supported by the Twitch ingest media servers. OBS Studio is a popular free and open source software for video recording and live streaming and most of the top streamers have created a very professional looking stream with OBS using overlay graphics and dynamic alerts to provide interaction between the streamer and the viewers. Top streamers regularly attract viewing audiences in the 10s of thousands.
Using OBS Studio on my trusty old Macbook Pro I was able to live stream my latest DJ set using a couple of webcams, some audio visualisation graphics and moi the superstar DJ on the decks! After playing for a few hours I had attracted a grand total of 1 viewer and his dog – but hey it was a lot of fun.
A few weeks later a friend of mine said to me “man you just don’t stream enough” and it was clear that to attract viewers and followers I would have to put in a lot of streaming hours which I just didn’t have time for. I thought that some kinda 24/7 automated stream would be cool – I could stream all day long! I wasn’t about to go out and buy a new Mac (or god forbid a gaming PC) and attempt to stream 24/7 from my home so I started thinking about other ways to develop a streaming platform that would run (economically) on a hosted unix server.
ffmpeg
I’ve been involved with media streaming projects in the past and was familiar with FFMPEG “A complete, cross-platform solution to record, convert and stream audio and video” A quick Google for “ffmpeg twitch” revealed that FFMPEG can also stream it’s output to Twitch (and other live stream services – YouTube, Facebook etc.) and after a few test streams I set about developing my own streaming platform using Docker service containers.
In November 2017 I started streaming Techno DJ sets 24/7. My goal was to create an interactive Twitch music channel (mostly playing Techno DJ sets) where viewers could interact with the channel by “liking” the DJ that was playing and change what was playing by making requests. Other DJ’s could upload their own sets which would then be reviewed and added to a dynamically changing daily playlist. I wanted the channel to be visually interesting with constantly changing and interesting visuals and dynamic overlays showing what was currently playing and how viewers had recently interacted with the channel. I also wanted to be able to feed audio into the stream relatively dynamically either from static local media files, live feeds – i.e. me on the sofa or from online sources such as Soundcloud and YouTube.
My Docker live stream environment looks a bit like this:
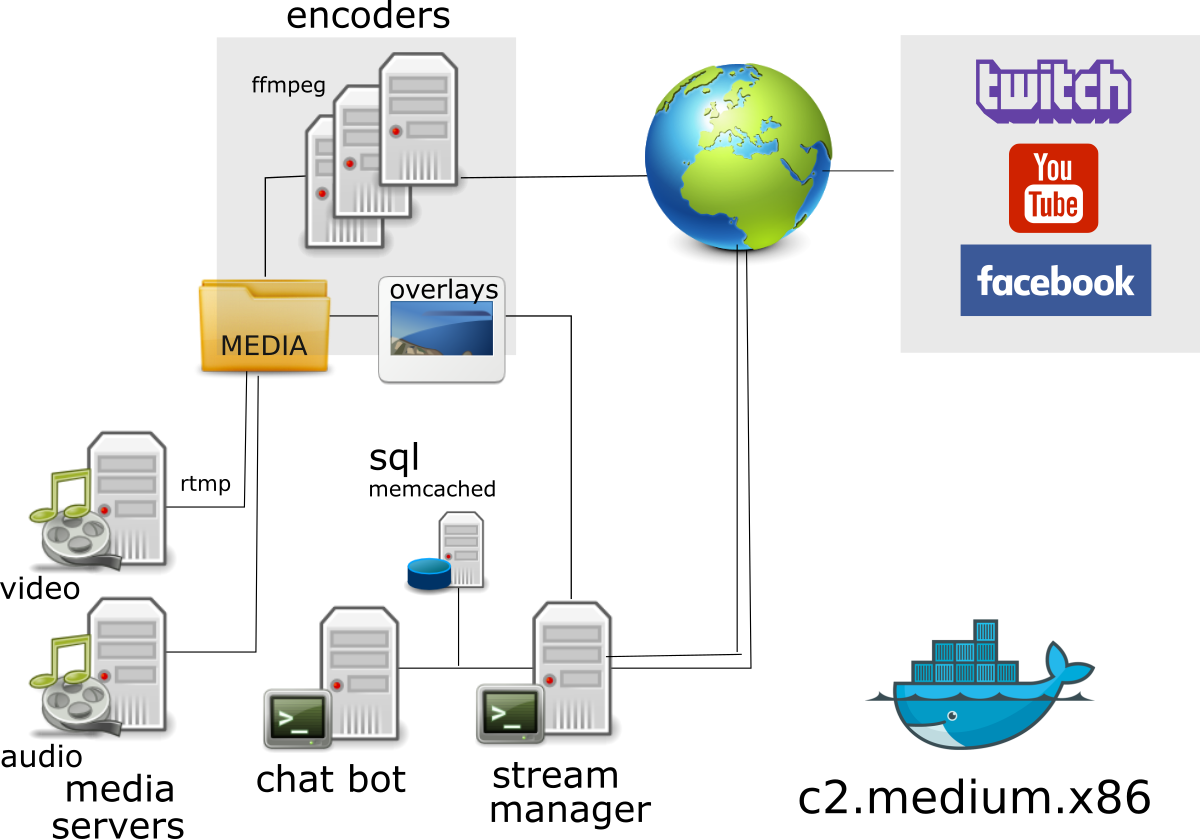
The media servers create the main audio and background video streams. The stream manager creates dynamic graphic and text overlays based on what is playing, viewer stats, ticker tape messages etc. It also monitors the encoder log files for errors and can restart encoders when required. Similarly the chat bot server interacts with viewers on Twitch accepting commands from the Twitch stream chat IRC channel allowing viewers to see what’s playing, “like” the current DJ or make requests. All the stream data required by the manager and chat bot is either stored in an SQL database or cached using memcached. The encoders – running ffmpeg in small debian Docker containers – encode all the stream data – audio, video, graphic and text overlays into a format accepted by the streaming service provider, i.e. Twitch.
I started developing the docker images and code for my live streaming platform on a VMWare Ubuntu server with access to a fairly good Intel processor. The most processor intensive containers are the media encoders running FFMPEG. Without a dedicated graphics GPU all the rendering needs to be done by the main processor/s. As the quality and frame rate of the stream increase so does the processing power required to encode the stream fast enough to satisfy the streaming service provider. For example YouTube expects a 720p HD stream to have a resolution of 1280×720 and a video bitrate range of 1,500 – 4,000 Kbps. As my content was relatively static – no high frame rate game action – I was able to lower my frames per second to 15 and still produce an acceptable looking 720p HD stream and with some other FFMPEG tweaks I was ready to move the stream to a live server.
Going Live
My live server is an 8GB VPS with 4 CPU cores. As soon as I started up the streaming containers everything else running on the server ground to a halt and it was pretty clear that I would need a dedicated server for live streaming.
With RAM and bandwidth not a real issue the VPS just needed enough CPU power to run at least 1 encoder. It took a few upgrades before I found a VPS that could handle the stream without completely maxing out the available processing power and that came within my monthly budget. The live server has been running one Twitch stream for over 6 months without any real problems. Occasionally the CPU maxes out causing the encoder threads to fail usually resulting in a stream “hang” or crash – this is no big problem Docker restarts the crashed server instantly and the stream manager will restart the encoder when errors in the logs are detected.
As I developed the stream I started added more overlays, more graphics and shiny knobs. All things that require more encoder power until I was at a point where I knew I would need to consider a new VPS, especially if I wanted to simultaneously stream to other services such as YouTube.
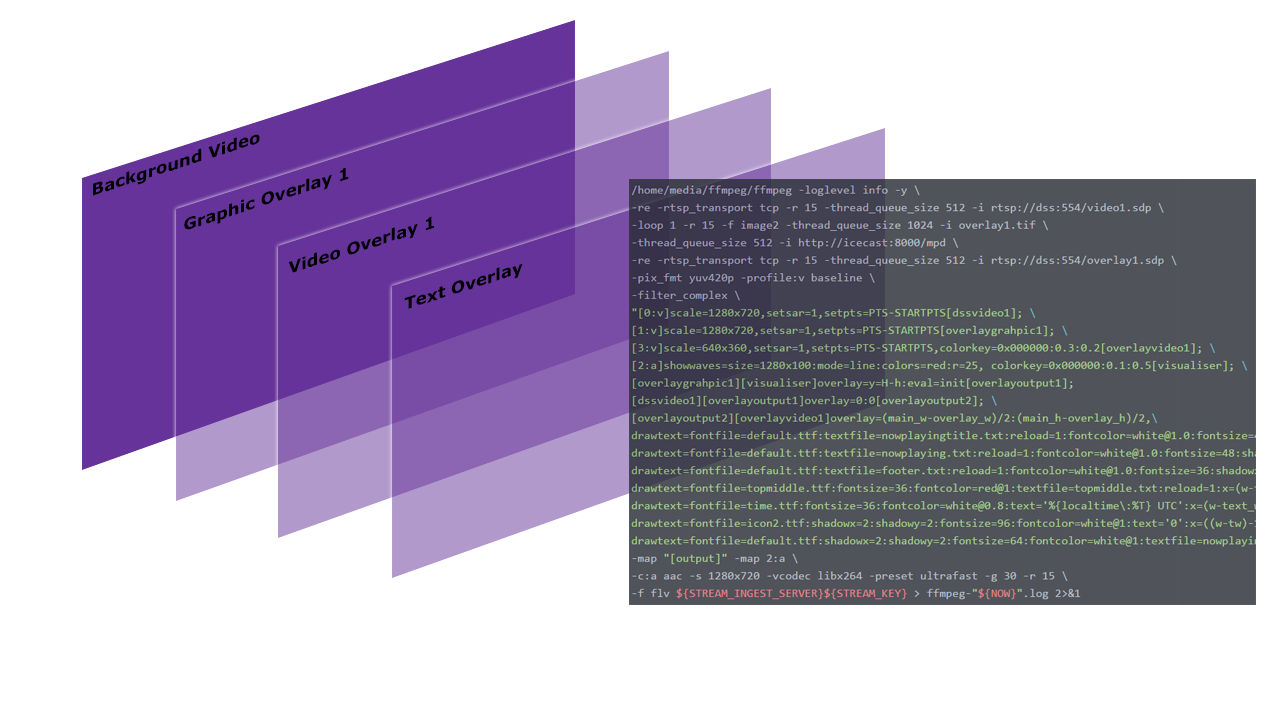
The Live Stream on Twitch @ 720p HD (15fps)
Introducing the Packet c2.medium.x86
About this time the nice people at Packet sent me an email inviting users to test their new AMD EPYC c2.medium.x86 bare metal servers and I jumped at the opportunity of trying out my streaming platform on a big beast of a server.
Installing my streaming environment on the c2.medium.x86 was a real breeze. The Packet c2.medium.x86 Ubuntu server deployed in Amsterdam in just a few minutes. I installed Docker and transferred all my data via a remote tar over ssh from my live streaming server to the c2.medium.x86. All my Docker containers built in a few minutes and then it was simply a case of stopping my live stream containers in London and starting the c2.medium.x86 containers in Amsterdam. Et Voila – I was streaming from Amsterdam!
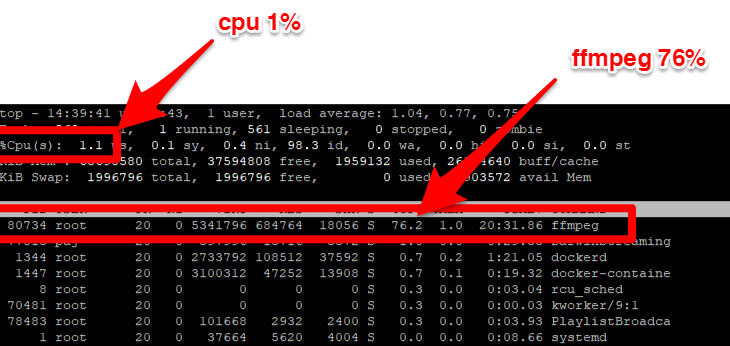
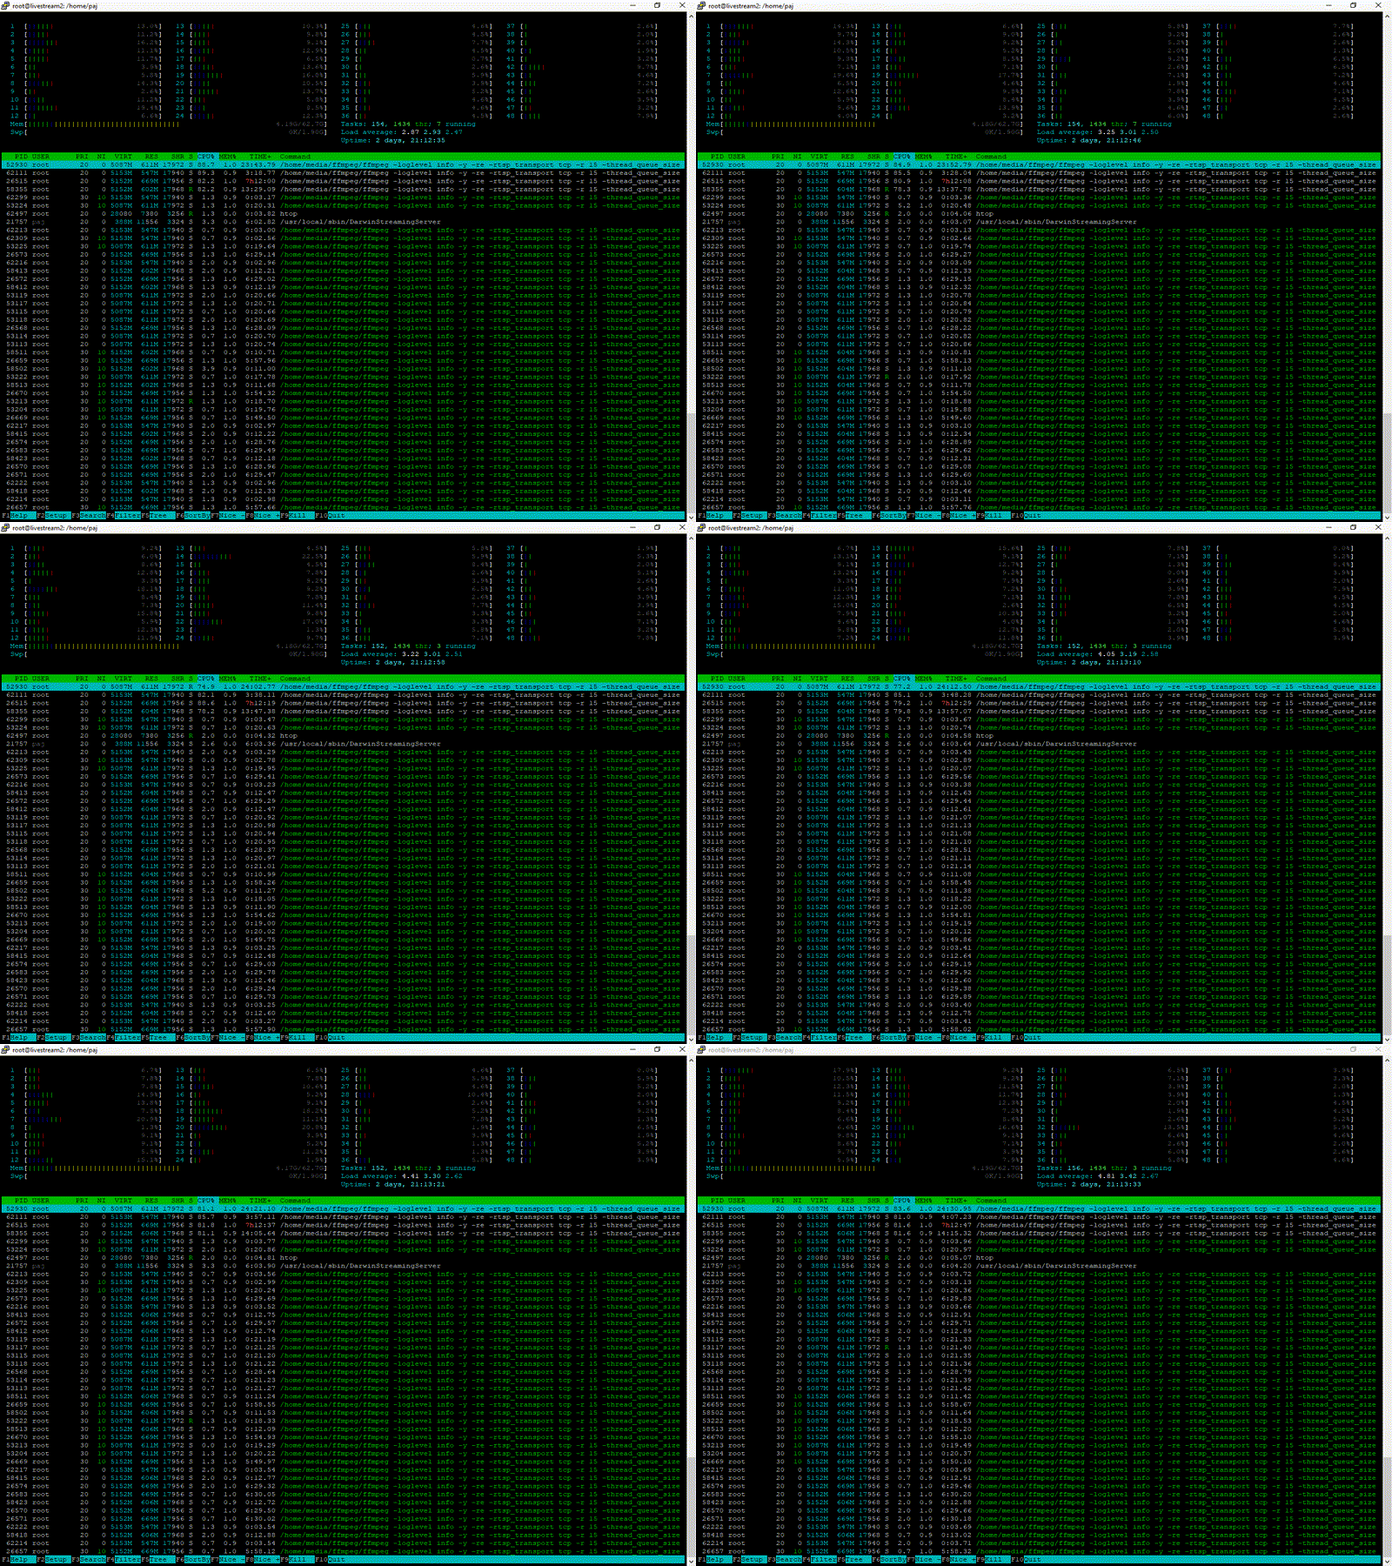
The c2.medium.x86 really puts the BEAR into bare metal server – because it is a beast of a machine with 24 physical cores / 48 hyperthreaded cores at a 2.0 Ghz base clock speed (3.0 Ghz max with turbo). With one encoder running my live Twitch stream the processor overall load was about 1%. You can see ffmpeg using 76% of one hyperthreaded core below.
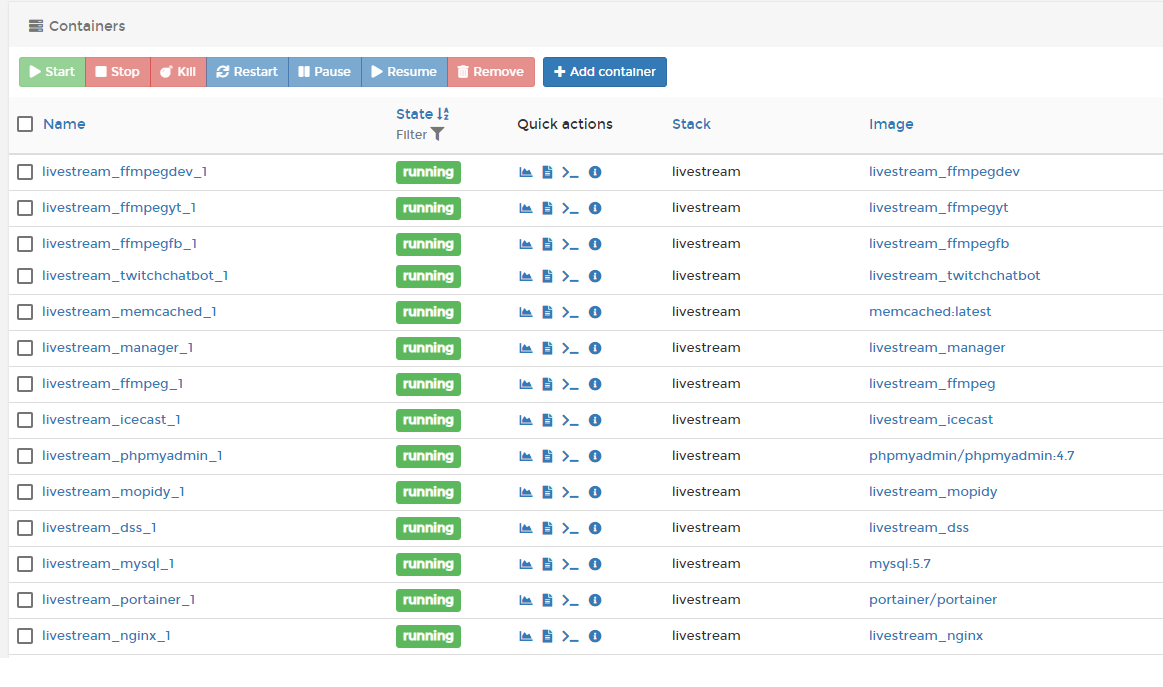
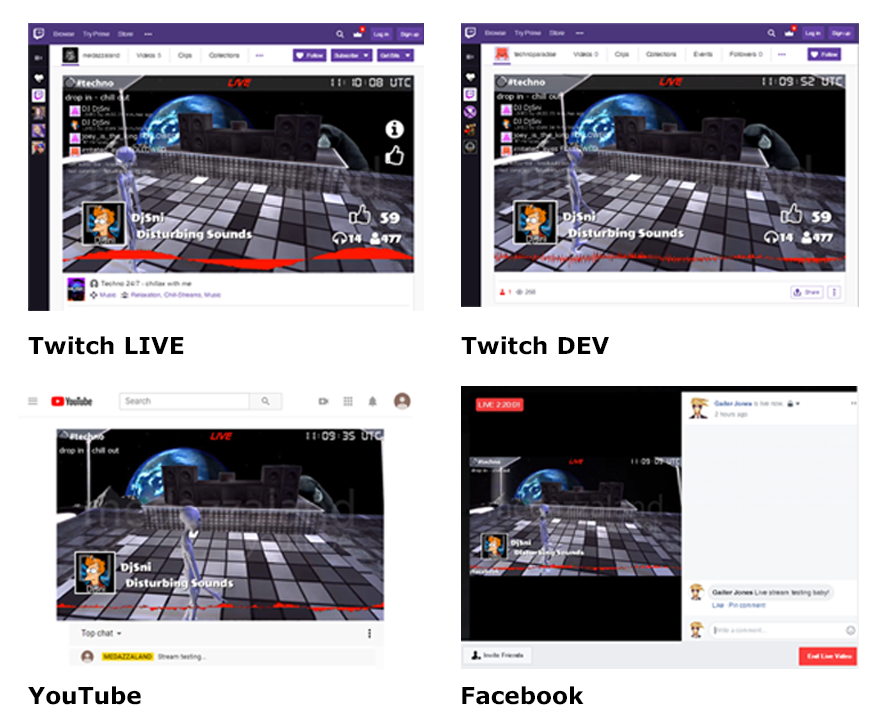
I asked a few questions in the Packet slack community about processor usage and the opinion was that I could probably run another 47 encoders before I maxed out the AMD EPYC processor. That would be 48 unique streams! To test this theory I created another three ffmpeg encoders to give me four concurrent live streams encoding on the AMD EPYC – 2 on Twitch, 1 on YouTube, 1 on Facebook. With all four encoders running processor utilisation was around 4%. Unfortunately I didn’t have any more YouTube, Facebook or Twitch accounts to stress the CPU with!
FFMPEG uses multi threading to take advantage of multi core processors, with 4 encoders running you can see lots of ffmpeg processes nicely spread across AMD EPYC hyperthreaded cores.
Conclusions
I am no expert when it comes to understanding the architecture of modern servers and processors but I do know that the AMD EPYC running in the Packet c2.medium.x86 was perfect for live stream encoding with ffmpeg.
Live streaming is becoming very popular across many social media platforms and whilst there are online services available that will multicast your live stream to multiple services there is no reason why you cannot create your own on demand streams broadcasting live content to various platforms either for a live event or for a one time marketing project.
Simply spin up a c2.medium.x86 and let it fly.
I want to thank Packet for giving me the opportunity of testing the c2.medium.x86 Server as part of their AMD EPYC challenge.

Comments