 This post was last updated 11 years 6 months 15 days ago, some of the information contained here may no longer be actual and any referenced software versions may have been updated!
I am a great fan of Apples open source streaming server Darwin, however for live streaming I also like to use Shoutcast and Icecast streaming servers as they support many more streaming source clients.
With Shoutcast you can create live broadcasts very quickly and reach large audiences cost effectively. I wanted to implement a new Amazon AWS server running Ubuntu 12.04 for a live streaming event and thought I would document the Shoutcast install process as I went along.
The commands below were executed as root, if you do not have root access use the sudo prefix to execute them with superuser privileges.
DOWNLOAD SHOUTCAST
Shoutcast does not come already packaged as an installer for Ubuntu so first we want to download the correct version of Shoutcast for our server.
goto http://www.shoutcast.com/broadcast-tools and download the version you require, I need the 64bit version for my 64bit Ubuntu 12.04 Amazon AWS server. The current version at time of writing is SHOUTcast Server v2.0.0.29/posix(linux x64)
Create an application directory for Shoutcast
/home/apps/shoutcast
get the shoutcast package
wget http://download.nullsoft.com/shoutcast/tools/sc_serv2_linux_x64_07_31_2011.tar.gz
Extract the package
gzip -d sc_serv2_linux_x64_07_31_2011.tar.gz
tar -xvf sc_serv2_linux_x64_07_31_2011.tar
This will extract the Shoutcast files, you will see the main binary sc_serv, some example config files and folders for logs and documentation.
If you want to start Shoutcast now, simple type ./sc_serv and you will be prompted to choose one of the detected config files. Choose 0 for the basic config file and check if the Shoutcast daemon starts without errors. The most likely startup error will be that it cannot bind the default TCP port as it is already in use, by default shoutcast will use TCP8000.
CREATE STARTUP SERVICE
We want to run Shoutcast as a background service that can easily be stopped and started. Use the bash script below and paste it into a new file called shoutcast in /etc/init.d
Modify the script with the correct locations of your sc_serv binary and the configuration file you want to use.
Make the script executable and give it full permissions
chmod +x /etc/init.d/shoutcast
chmod 755 /etc/init.d/shoutcast
Then install shoutcast as a service with
root@ubuntu:/etc/init.d# update-rc.d shoutcast defaults
Adding system startup for /etc/init.d/shoutcast …
/etc/rc0.d/K20shoutcast -> ../init.d/shoutcast
/etc/rc1.d/K20shoutcast -> ../init.d/shoutcast
/etc/rc6.d/K20shoutcast -> ../init.d/shoutcast
/etc/rc2.d/S20shoutcast -> ../init.d/shoutcast
/etc/rc3.d/S20shoutcast -> ../init.d/shoutcast
/etc/rc4.d/S20shoutcast -> ../init.d/shoutcast
/etc/rc5.d/S20shoutcast -> ../init.d/shoutcast
Start service
Check if shoutcast will start and stop using
/etc/init.d/start shoutcast or service shoutcast start
You can confirm shoutcast is running by searching for it’s running process
ps -ef | grep sc_serv
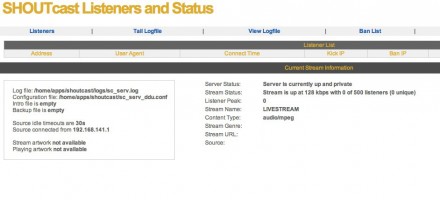
You can also confirm the server is running by connecting to shoutcast with your browser using
http://server.address:8000/index.html

TCP 8000 is the default listener port used by Shoutcast, note, if your server is already using TCP8000 select another port for Shoutcast and configure it in your config file with e.g. portbase=8010
Restart shoutcast and connect using http://server.address:8010/index.html
Ensure that you change the default changeme admin passwords in the configuration file.
To configure your streaming mount points simply create configuration entries for each live stream you require
streamid_1=1
streampath_1=/livestream1
streampassword_1=password
streamid_2=2
streampath_2=/livestream2
streampassword_2=password
Test streaming
Assuming Shoutcast now starts correctly with your configuration file and you can connect to the admin page with your browser you should configure your streaming client to connect to the server.
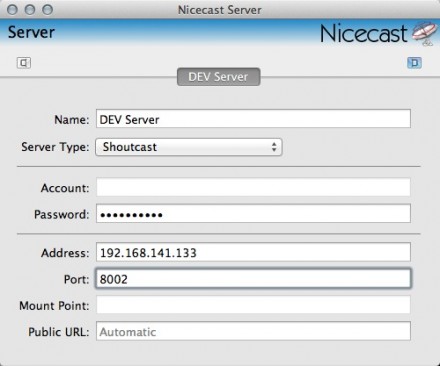
The client will normally specify the server type as shoutcast, and then will require the server address and password for the mountpoint. In some cases you may need to specify the mount point in the client too as configured.
Here is a server config example from Nicecast connecting on TCP8002.

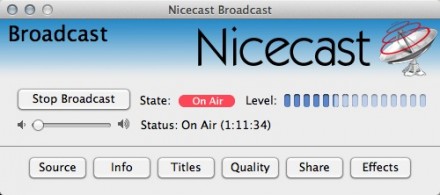
With your streaming client source connected, you can then publish the stream address as http://server.address:8010/mountpointname

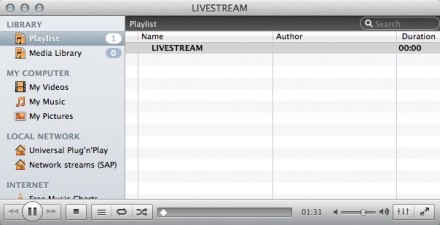
Test you are now streaming live by connecting any media player to the stream url.

Note be sure to configure the stream meta information in your client, shoutcast will reject the streaming client connection if the source URL meta tag is left blank.
Startup script
#!/bin/sh

### BEGIN INIT INFO
# Provides:          Shoutcast application instance
# Required-Start:    $all
# Required-Stop:     $all
# Default-Start:     2 3 4 5
# Default-Stop:      0 1 6
# Short-Description: starts instance of Shoutcast
# Description:       starts instance of Shoutcast using start-stop-daemon
### END INIT INFO#

############################################################################
##  CHANGE THESE VALUES to match your setup
## CONFIG is the fully qualified location of your config file
## DAEMON is the fully qualified location of the sc_serv binary
############################################################################

CONFIG="/home/apps/shoutcast/sc_serv_basic.conf"
DAEMON="/home/apps/shoutcast/sc_serv"

# Check for SHOUTcast binary
test -f $DAEMON || exit 0

# The init commands
case "$1" in
        start)
                echo "Starting SHOUTcast server..."
                $DAEMON $CONFIG  > /dev/null 2>&1 &
                ;;
        stop)
                echo "Stopping SHOUTcast server..."
                kill -9 `ps -C sc_serv -o pid --no-headers`
                ;;
        restart)
                echo "Stopping SHOUTcast server..."
                kill -9 `ps -C sc_serv -o pid --no-headers`
                echo "Starting SHOUTcast server..."
                $DAEMON $CONFIG  > /dev/null 2>&1 &
                ;;
        *)
                echo "usage: /etc/init.d/shoutcast"
                echo "$0 {start | stop | restart}"
                exit 1
                ;;
esac
Hi,
Thank you for posting this. I have a question.
1. Can i have my streaming source on AWS? How would i set it up?
I want to be able to upload songs to the source and have it auto play.