 This post was last updated 12 years 6 months 15 days ago, some of the information contained here may no longer be actual and any referenced software versions may have been updated!
DSS no longer compiles and runs new Ubuntu versions. If you want to use Darwin Streaming Server run it as a docker container using my DSS image.
If you want to know how I compiled DSS 6.0.3 on Ubuntu PRECISE back in the stone age – read on…
Over the last few years I have been involved with some projects that required streaming audio and video solutions and I have been working with the Open Source Darwin Streaming Server from Apple running mainly on the Linux platform. DSS will run under Windows but I wouldn’t recommend it.
The Darwin Streaming Server (DSS) is the open source version of Apples quicktime server technology which is built into Apples OS X Server. DSS can run under Mac OSX, Windows and Linux. The streaming server supports QuickTime Movie (MOV), MPEG-4 (MP4), and 3GPP (3GP) “hinted” files. Support resources for DSS are quite limited so I will start to post information here to document some of the work I have done with DSS, including installation, configuration, use etc.
This first post will document the compilation, installation and testing of the current version of DSS, v6.0.3 under Linux.
The commands below assume you have superuser rights.
Compilation
To compile DSS we first need to make sure we have the required packages for the download and compile utilities.
Execute the following as a superuser, or use the sudo prefix command.
apt-get install build-essential wget
Need to get 19.6MB of archives.
After this operation, 66.8MB of additional disk space will be used.
Do you want to continue [Y/n]?
Hit Y to download and install the required packages.
Change to a working directory for the download and compilation i.e. /home/DSS and download the DSS 6.0.3 source (31MB) tar file directly to your working folder using wget:
wget http://static.macosforge.org/dss/downloads/DarwinStreamingSrvr6.0.3-Source.tar
Uncompress the tar file
tar -xvf DarwinStreamingSrvr6.0.3-Source.tar
Rename the source file directory to allow us to create a patch directory. The patches are required to compile DSS under a 64bit OS, but there is also no harm in applying them if you are using a 32bit OS.
mv DarwinStreamingSrvr6.0.3-Source DarwinStreamingSrvr6.0.3-Source.orig
Download the first patch file
wget http://dss.macosforge.org/trac/raw-attachment/ticket/6/dss-6.0.3.patch
Apply the patch
patch -p0 < dss-6.0.3.patch
Move the source file directory back
mv DarwinStreamingSrvr6.0.3-Source.orig DarwinStreamingSrvr6.0.3-Source
Download the second patch file
wget http://dss.macosforge.org/trac/raw-attachment/ticket/6/dss-hh-20080728-1.patch
Apply the patch
patch -p0 < dss-hh-20080728-1.patch
Change into the DSS source file directory
cd DarwinStreamingSrvr6.0.3-Source
Rename the source install file
mv Install Install.orig
Get the latest install file
wget http://dss.macosforge.org/trac/raw-attachment/ticket/6/Install
Set execute permissions on the install file
chmod +x Install
Compile the source code (dot slash Buildit)
./Buildit
-----------------------
Configuring for the Linux i686 platform
Building for Linux.i686 with gcc
Now is a good time to grab a coffee as the build process could take a few minutes. The various warning messages you will see can be safely ignored and unless you experience another serious error the compilation is completed when the command prompt returns.
Installation
First create the qtss user and group required by DSS
addgroup -system qtss
adduser -system -no-create-home -ingroup qtss qtss
and then run the DSS install script. (dot slash Install – case sensitive!)
./Install
The install script creates the DSS directory structure and copies files and sample media. When complete you will be prompted to create an administrator username and password. Enter the username and password you will use to administer DSS. Confirm the password.
Adding userName admin
Setup Complete!
Check permissions for the DSS configuration file in /etc/streaming, it must be writeable or the changes made in the administration pages will fail.
chmod 755 /etc/streaming/streamingserver.xml
The DSS installation is now complete, and the server should be started! To manually start the server use
/usr/local/sbin/streamingadminserver.pl
If the server is already running you will see
Failed to start Streaming Admin Server.
Port 1220 is in use by another process.
The Streaming Admin Server may already be running.
We can also configure DSS to auto start automatically on boot up, to do this download the following script
wget http://dss.macosforge.org/trac/raw-attachment/ticket/6/darwin-streaming-server
make it executable
chmod +x darwin-streaming-server
Move the script into /etc/init.d
mv darwin-streaming-server /etc/init.d/darwin-streaming-server
and update rc.d to so that it can auto start and respond to start/stop commands.
update-rc.d darwin-streaming-server defaults
The server can now be started and stopped with
/etc/init.d/darwin-streaming-server stop
/etc/init.d/darwin-streaming-server start
Configuration
The administration web service for DSS runs on TCP port 1220, to login to the server start a browser session and navigate to
http://servername-or-ip-address:1220
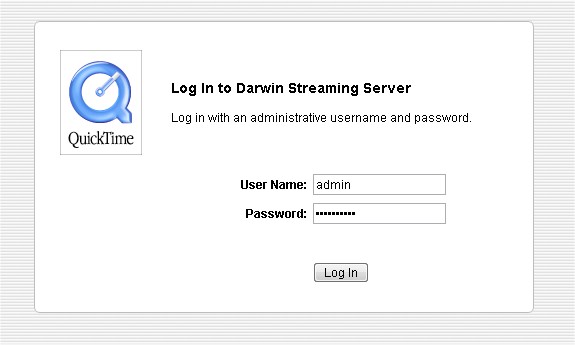
You will see the DSS login page, login with the username and password you created during the installation and click the Log In button.

The setup assistant will ask you for a MP3 broadcast password “The MP3 Broadcast password is required in order to receive MP3 broadcast streams.”
Enter the MP3 broadcast password you wish to use and click next to continue.
The setup assistant will ask you if you want to enable SSL for admin. “This will enable encryption between the administration server and the web client. This feature requires that you have a valid streaming server SSL certificate installed.”
Click the Next button to continue.
The setup assistant will ask you to confirm the Media folder for DSS “This is the folder or directory in which your media is stored.” To accept the default media folder (/usr/local/movies/) click the Next button, or enter the path to a new media folder. If you change the media folder make sure you set ownership of the new folder to the qtss user
chown -R qtss.root /home/mymediafolder
The setup assistant will ask you if you want to use Port 80 for streaming “This allows you to stream through firewalls.” Streaming on TCP port 80 instead of default RTSP ports will ensure that streaming clients behind most firewalls that might have none standard ports, such as RTSP blocked, will be able to access the streaming server via TCP Port 80 which is commonly used for HTTP access and is more likely to be permitted through firewalls. I recommend considering this later as you need to be sure that any existing services running on Port 80, i.e. Apache have been modified or stopped before you try and use DSS streaming on Port 80.
Click the Finish button to continue.
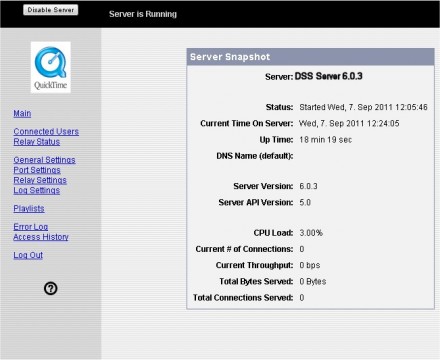
The main DSS administration screen will appear and the DSS installation and basic configuration is complete.

Make a tarball of your install directory and save it somewhere for future use!
Testing
If you look in the default media directory (/usr/local/movies) you will see some test audio and video media files.
i.e. /usr/local/movies/sample_h264_300kbit.mp4
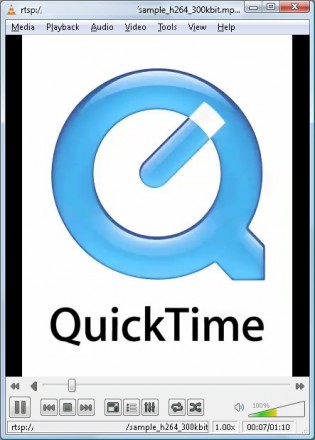
To test your installation and stream one of the example media files open a media player capable of RTSP streaming, i.e. Apple Quicktime Player, VLC and open a new network stream in the player with the address
rtsp://servername-or-ip-address/sample_h264_300kbit.mp4
The 300Kbit h264 sample MP4 file will stream from your server and should play in your media player.

DSS Uses the following default directories for config, playlists, logs etc.
/usr/local/sbin/Darwin Streaming Server —- Server Software
/usr/local/sbin/streamingadminserver.pl —- Web Frontend
/etc/streaming —- Configuration Directory
/etc/streaming/streamingserver.xml —- Configuration File
/var/streaming/logs —- Logs
/usr/local/movies —- Default media directory
I will look at configuring the server further and preparing media for streaming in another blog post.
Further Resources
Looking for a media player for darwin mp3 streams – check out the facebook darwin media tab demo on my facebook page.
http://ubuntuforums.org/archive/index.php/t-651556.html
http://lists.apple.com/mailman/listinfo2/streaming-server-users
http://dss.macosforge.org/post/40/
http://soundscreen.com/streaming/
Thanks alot man
Worked like Magic
I am going to do this I will post my results… cheers
I got the message:
cannot access ‘/etc/streaming/streamingserver.xml’ : No such file or directory
I followed all the instructions for the installation. Why am I getting this message?
Have you checked the permissions : chmod 755 /etc/streaming/streamingserver.xml What operating system are you compiling it on, the streaming server will not compile under newer OS versions, check out my docker container for DSS for a working docker version of DSS.
hello, your docker container for DSS is gaiterjones/darwin-streaming right?
and the docker container run command is ? default admin password is ?
I have updated the container today. Make sure you pull the latest version and start it with
docker run -t -d -e "DSSUSER=admin" -e "DSSPASS=password" --restart=always -p 1220:1220 -p 554:554 -p 7070:7070 -p 8000:8000 -p 8001:8001 --name="dss" gaiterjones/darwin-streaminglogin to admin via http://server:1220 using the username and password defined in the run command.
Thank you very much.
But it doesn’t seem to be pushing rstp streaming
eg:
ffmpeg.exe -i rtsp://admin:admin@192.168.0.1/ -vcodec copy -acodec copy -f rtsp rtsp://192.168.0.2/test.sdp
You can test the server is working using VLC and opening a network stream with the URL
rtsp://192.168.x.x/sample_h264_300kbit.mp4The sample video will play. If you create a playlist replace the sample video with the playlist name, i.e. stream1.sdp.
Or in ffmpeg
ffmpeg -i rtsp://192.168.x.x/stream1.sdp